زکات علم

زَکاةُ العِلمِ أن تُعَلِّمَهُ عِبادَ اللّه‏ِ امام باقر (ع)
زکات علم

مطالبی در زمینه کامپیوتر و علاقه مندی های شخصی من مطالب این وبلاگ غالبا مطالبی ست که در جای جای اینترنت کتاب یا دانشته های شخصی خودم می باشد که به عنوان مرجعی برای رجوع دوباره در اینجا جمع آوری شده اند .
ehsunitd.ir personal website

پیوندها

۲۹ مطلب با موضوع «آموزش کاربردی» ثبت شده است

٢۵ ترفند CSS بسیار مفید که باید بدانید

دسته بندی‌ها 

CSS

در این مقاله، ٢۵ ترفند CSS بسیار مفید مطرح شده است که به شما کمک می کند صفحات وب بسیار عالی طراحی کنید. ممکن است شما برخی یا همه ی این ترفند ها را از قبل بلد باشید، با این حال، این می توانید یک مرجع دم دستی برای ترفند های جذاب CSS برای شما باشد که باید بدانید.

این مقاله، ترجمه‌ی آزاد با حذف و اضافات از مقاله‌ی زیر است:
http://webdeveloperplus.com/css/25-incredibly-useful-css-tricks-you-should-know/

١ - تغییر رنگ متن در حالت انتخاب شده

  • ehsan gholami

دو خطای رایج:

404 – Page Not Found :

این پیام خطا زمانی رخ می دهد که صفحه ای که درخواست شده بر روی سرور وجود ندارد. ممکن است به علت اشتباه تایپی این مشکل بوجود آید.

500 – Internal Server Error :

این پیغام خطا زمانی اتفاق می افتد که سرور نتواند یک اسکریپت در حال اجرا را پردازش نماید. این پیام خطا به طور معمول شامل اطلاعات مربوط به خطا در اجرای اسکریپت می شود.

سایر خطاها:

4xx – Client Error :

  • ehsan gholami

As an administrator of your own wiki, to edit your own MediaWiki:Sidebar, replace your wiki page's <title> in the title bar with <MediaWiki:Sidebar>. (The editinterface permission needs to be enabled and is enabled for administrators by default; for information on assigning it to other groups, see Manual:User rights.) You may need to use the syntax//yourdomain/yourwiki/index.php?title=MediaWiki:Sidebar&action=edit if you use long URLs.

If you are sure you are logged in with the relevant rights but do not see the edit link, click on the create tab at the top of the page - this will take you to the edit page.

Example sidebar code:

Sidebar example

* navigation
** mainpage|mainpage
** Special:RecentChanges|Recent changes
* new heading
** portal-url|portal
** http://www.mediawiki.org|MediaWiki home

Headings

The navigation bar can be split into sections, each with a heading of its own. The heading for each section is taken from the first-level list element ("navigation" and "new heading" in the example above).

If this text corresponds to the name of an interface message (an existing page of that title in the MediaWiki namespace), then the text of that page is used as a label; otherwise, the header title is used as-is.

Bug: no sidebar is shown in the Nostalgia skin (bug 10794).

Links

Second-level list elements are links ("mainpage|mainpage" in the example above), where the format is:

** target|link text
target
The link target can be the name of an interface message (page in the MediaWiki namespace) or wiki page, or an external link. In either case, the link can be internal, interwiki, or external. In some cases (such as links with the "&" character), an interface message is necessary. The link target cannot be made dependent on the interface language set in the preferences.

Algorithm followed:

  1. Get the target text.
  2. If there is an existing or default interface message with that name, use the content of that message instead of the target text.
  3. If the output from the previous step is a valid URL (beginning with http:// or other URL protocol), the link will point to that URL.
  4. Else, it will treat it as the link target of a wikilink (linking to that page name or interwiki).
  5. In case it would end up linking to '-', the whole entry is removed from the sidebar (that's useful for removing an entry on all languages by changing the message holding the link).

Examples:

  • "** portal-url|portal" uses the text of MediaWiki:Portal-url (which contains "Project:Community portal").
  • "** Special:RecentChanges|Recent changes" links to Special:RecentChanges, since there is no interface message of that name.
  • "** w:Foo|Some interwiki page" links to w:Foo for the same reason.
  • "** http://www.mediawiki.org|MediaWiki home" links to http://www.mediawiki.org for the same reason.

text

The link text can be the name of an interface message (page in the MediaWiki namespace) or plain text.

  • If the link text is the name of an existing or default interface message, the content of that message will be used. MediaWiki will check for localized versions; for example, if the current language is fr (French) and the link text is the interface message "forum", it will check for "forum/fr" before using "forum".
  • Otherwise, the link text is used as the target as-is.
  • Notice that the link text is not optional as in normal wiki links. If the link text is missing, the item is ignored.

Examples:

  • ** Homepage|mainpage uses MediaWiki:Mainpage (which contains "MediaWiki").
  • ** Special:Recentchanges|Recent changes uses "Recent changes", since there is no interface message of that name.

Order of elements

By default, the sidebar consists of elements in this order: navigation, search, toolbox, languages. The order can be changed (in MediaWiki 1.13+) by adding special keywords (SEARCH, TOOLBOX and LANGUAGES) to MediaWiki:Sidebar using the heading syntax. For example, the following code moves the search box to the top of the sidebar:

* SEARCH

* navigation
** mainpage|mainpage
** Special:Recentchanges|Recent changed
* new heading
** portal-url|portal
** http://www.mediawiki.org|MediaWiki home
  • ehsan gholami

Red Hat Enterprise Linux 6 or CentOS 6.4

Almost everything must be done as superuser.

First grab what we need

yum install httpd php php-mysql php-gd mysql-server php-xml mysql

Start MySQL and secure it

service mysqld start
mysql_secure_installation

Create a new database and wiki user to avoid using the root user:

 mysql -u root -p
 CREATE DATABASE database name;

For example only:

 CREATE DATABASE wikidatabase;  

To view if it was created:

 SHOW DATABASES;

Grant privileges:

 GRANT ALL PRIVILEGES ON *.* TO 'wiki'@'localhost' IDENTIFIED BY 'THISpasswordSHOULDbeCHANGED' WITH GRANT OPTION;
 exit

For example only:

 GRANT ALL PRIVILEGES ON wikidatabase.* TO 'wikiuser'@'localhost' IDENTIFIED BY 'Pippo123456?' WITH GRANT OPTION;
 exit

Remember the 'wiki' password for MySQL that you create here. You will need it when setting up the wiki database. You can test it with:

 mysql -u wiki -p
 
 SHOW GRANTS;

Make sure Apache and MySQL starts on boot

chkconfig httpd on
chkconfig mysqld on

You can install mediawiki directly from the mediawiki web site or you can install pre-built packages from the Fedora Project Extra Packages for Enterprise Linux (EPEL)repository. Many RHEL and CentOS users find EPEL is a good source for packages not included in the base system.

Download mediawiki directly (the current version as of this writing, may have changed since) in some directory of your choice. Here I put it in /root.

cd /root
wget http://download.wikimedia.org/mediawiki/1.21/mediawiki-1.21.2.tar.gz

Also it works with:

wget http://dumps.wikimedia.org/mediawiki/1.21/mediawiki-1.21.2.tar.gz

Install. Use a symlink for easy upgrades.

cd /var/www
tar -zxf /root/mediawiki-1.21.2.tar.gz
ln -s mediawiki-1.21.2/ mediawiki

Instead of downloading and installing, you can use EPEL. If you haven't done so, add the EPEL repository as a source for your package manager. Then see what mediawiki packages are available

yum list 'mediawiki*'

or, if you want descriptions of each package

yum info 'mediawiki*'

Then install those that you choose with a command like

yum install 'mediawiki121'

Setting up Apache can be done in numerous ways according to your preferences. In this example I simply change Apache to look at /var/www by default, so the link to the wiki will be http://server/mediawiki. This is convenient for running more than one site on the server. If you only need mediawiki running on the server, change instances of /var/wwwbelow to /var/www/mediawiki (Also it works with: /var/www/mediawiki-1.21.1). Open /etc/httpd/conf/httpd.conf and search for and change these three lines:

DocumentRoot "/var/www"
<Directory "/var/www">     <-- this is the SECOND "<Directory" entry, not the 'root' one
DirectoryIndex index.html index.html.var index.php

Changing the /var/www to /var/www/mediawiki assumes you did the following:

cd /var/www
ln -s mediawiki121/ mediawiki
chown -R apache:apache /var/www/mediawiki-1.21.1 

Also it works with:

chown -R apache:apache /var/www/mediawiki

Restart Apache

service httpd restart

You also want to open ports in your firewall using

 system-config-firewall-tui

Enable both the https and http services (follow the instructions of the configuration interface). Finally, you can do some magic with selinux to change the context of the directories you installed, but I recommend you just go to /etc/selinux and modify conf making it either "permissive" or "disabled." I also had to create a link to /usr/share/mediawiki121/load.php in my /var/www/mediawiki directory and change the ownership on the /usr/share/mediawiki121 directory to apache.apache.

And you're good to go. Point a browser at http://yourserver/mediawiki and follow the instructions.

  • ehsan gholami

100% accurate.  Marketing numbers vs. actual size or different math types.

You are missing nothing.

Advertised Actual Capacity
10GB ~9.31 GB
20GB ~18.63 GB
30GB ~27.94 GB
40GB ~37.25 GB
60GB ~55.88 GB
80GB ~74.51 GB
100GB ~93.13 GB
120GB ~111.76 GB
160GB ~149.01 GB
180GB ~167.64 GB
200GB ~186.26 GB
250GB ~232.83 GB
320GB ~298.02 GB
400GB ~372.53 GB
500GB ~465.66 GB
640GB ~596.05 GB
750GB ~698.49 GB
1TB ~931.32 GB

Also note - my chart is more of a rough one - I have seen more and less space for each of those formatted.  Depends on manufacturer, model and what file system you format with, even.  So I could be off a few GBs in any direction.

Might read this:

http://compreviews.about.com/od/storage/a/ActualHDSizes.htm

  • ehsan gholami

<video width="470" height="255" controls> <source src="video.mp4" type="video/mp4"> <source src="video.ogg" type="video/ogg"> <source src="video.webm" type="video/webm"> <object data="video.mp4" width="470" height="255"> <embed src="video.swf" width="470" height="255"> </object></video>
دومی کار میکنه لینک عکس توی پوستر 


<video width="470" height="255" poster="placeholder.png" controls>
 <source src="video.mp4" type="video/mp4">
 <source src="video.ogg" type="video/ogg">
 <source src="video.webm" type="video/webm"> 
 <object data="video.mp4" width="470" height="255">
 <embed src="video.swf" width="470" height="255"> </object></video>


http://host17.aparat.com//public/user_data/flv_video_new/386/9b4f5dced63d3b972a7ea5ec2385a12f1155335.mp4

  • ehsan gholami

در ویندوز 8 هنگام رفتن به سیستم جامع گلستان با مرورگر

برای باز شدن سیستم گلستان در ویندوز8 ابتدا نرم افزار mozilla firefox را نصب کرده سپس مراحل زیر را به ترتیب ادامه دهید : 

1. ابتدا روی آیکون mozilla firefox راست کلیک کرده و گزینه properties را بزنید، سپس در پنجره باز شده گزینه compatibility را انتخاب کرده ودر قسمت compatibility mode گزینهrun this program را انتخاب کرده و از منوی کشویی windows xp (service pack2 را انتخاب کنید 


  • ehsan gholami

تبدیل مبناها :

هر مبنایی به اندازه عدد مبنا کد دارد  که از  صفر  شروع و تا  عدد مبنا منهای یک  ادامه دارد

 مثلاً مبنای 10 دارای 10 کد می باشد که  شامل 0 تا 9  می باشد 

یا مبنای 16 دارای 16 کد میباشد که از 0تا 15 ادامه دارد  ولی اعداد دو رقمی در این مبنا با حروف الفبا نشان داده می شود

  • ehsan gholami


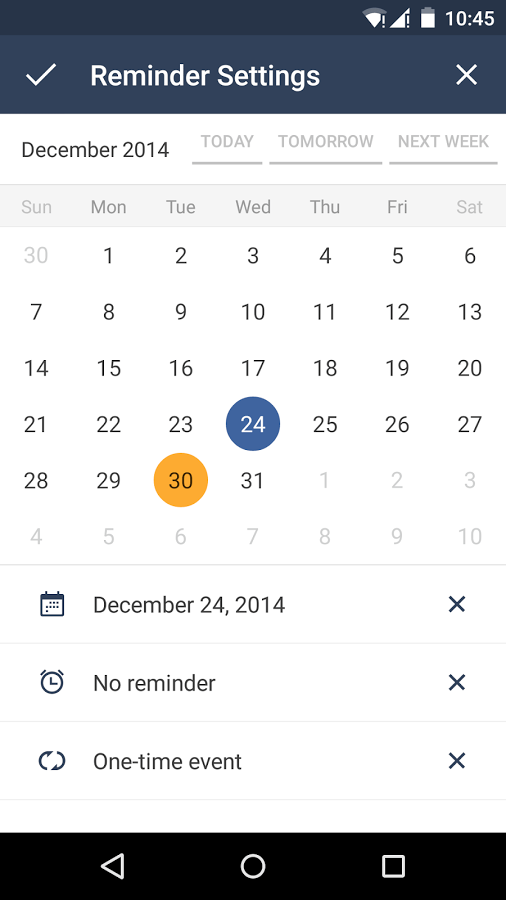
این روز ها همه با ابزار های الکترونیکی و گت های خود یادشت های خود را انجام می دهن من هم بعد از نصب انواع این برنامه ها به این نتیجه رسیدم که از گوگل بهتر نیست و همیشه به طرق مختلف در دسترسه و تمامی برنامه های دیگر از اون ساپورت میکنن راحته کاربرد پسنده و افزونه های زیادی هم داره اینجا روش اضافه کردن تقویم فارسی رو آوردم و لینک دانلود تقویم و گوگل تسک برای اندروید

لینک دانلود برنامه از کافه بازار برنامه برای اضافه کردن کارهای روزانه با قابلیت تیک زدن تسک ها را میتوان در جیمیل هم دید 

http://cafebazaar.ir/app/org.dayup.gtask/?l=fa 

برای استفاده از تقویم هم میتوانید با تقویم گوشی خودفقط ادرس ایمیل خود را بدهید تا تقویم شما به گوشیتان اضاف شود .

برای اضافه کردن تقویم شمس هم میتونید از این روش استفاده کنید .

اینم تقویم خوبیه 

http://cafebazaar.ir/app/org.withouthat.acalendar/?l=fa

برای اینکار تنها کافی است از ستون چپ روی other Calendar کلیک کنید. Add by URL را انتخاب نمایید. ولینک زیر را در آن کپی نمایید و Add Calendar را انتخاب نمایید.
http://www.google.com/calendar/ical/fm79ocs70hfo6b8q1qsp3mj6b4@group.calendar.google.com/public/basic.ics

به همین سادگی ، به همین خوشمزگی !

البته برای فعال کردن تعطیلات رسمی کشورمون هم به این صورت عمل کنید :

با استفاده از نماد چرخ دنده بالای صفحه تقویم به «تنظیمات تقویم» (Calendar Settings) بروید. بر روی برگه «تقویم‌ها» (Calendars) کلیک کنید، سپس بر روی «مرور تقویم های جالب» (Browse interesting calendars) کلیک کنید. به جستجوی «تعطیلات ایرانیان» (Iranian Holidays) در برگه تعطیلات بپردازید. می‌توانید از پیوند «اشتراک» (Subscribe) نمایش‌داده‌شده در جلوی «تعطیلات ایرانیان» (Iranian Holidays) برای نشان دادن تعطیلات در تقویم خود استفاده کنید.


  • ehsan gholami