زکات علم

زَکاةُ العِلمِ أن تُعَلِّمَهُ عِبادَ اللّه‏ِ امام باقر (ع)
زکات علم

مطالبی در زمینه کامپیوتر و علاقه مندی های شخصی من مطالب این وبلاگ غالبا مطالبی ست که در جای جای اینترنت کتاب یا دانشته های شخصی خودم می باشد که به عنوان مرجعی برای رجوع دوباره در اینجا جمع آوری شده اند .
ehsunitd.ir personal website

پیوندها

۳ مطلب در مرداد ۱۳۹۳ ثبت شده است

CentOS Samba 4 - Active Directory Domain Controller


With the recent stable release of Samba 4, it is possible to create a compatible Active Directory Domain Controller that runs on the Linux platform. Samba 4 has been in beta for years now, but with the stable release as of December 11, 2012 you should now have a compelling argument for implementing Samba into your enterprise IT network. Samba 4 is a complete re-working of the Samba code and to sum it up best is to simply quote from the Samba 4 website:

“Samba 4 is available for download via the Samba Website or from the Git repository. In short, you can join a Windows (all recent releases should be supported) machine to a Samba 4 domain, and it will behave much as it does in AD, including Kerberos domain logins where applicable. The official press release can be found on theSamba website.”


  • ehsan gholami

Y} Faux Capiz Shell Pendant


A couple weeks ago I showed you the crystal globe pendant I hung in Ellie's room.  Since there isn't an overhead light in her room, the pendant is a nice way to give the illusion of a fun light fixture without the expense and hassle of running wires and installing one.

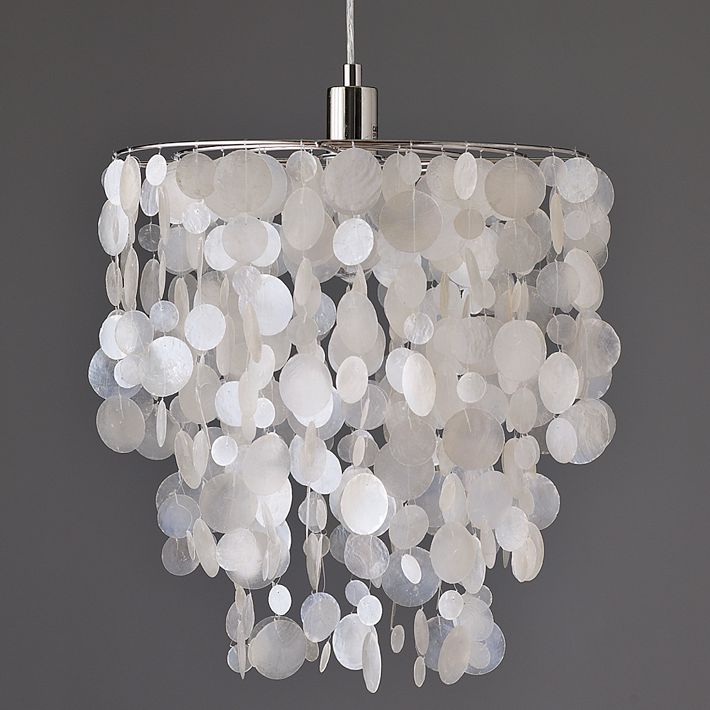
Ada's room is the same, with no overhead light, and I wanted to hang something above her chair too.  I'd been seeing a lot of faux capiz shell chandeliers around and decided that was the way I wanted to go.  As for the look, I liked the layered look of this real capiz chandelier from West Elm:
 

I also liked the draped top of this beaded chandelier:
 

I set out to combine the two looks by constructing a frame out of the top of an old lampshade, metal craft rings, and clear hanging wire.
 

I used four rings total, in descending size order.  It's important to measure the hanging wire carefully and space them equally apart to get the rings to hang level.  To be honest, this step was a little more tedious than I thought it would be.

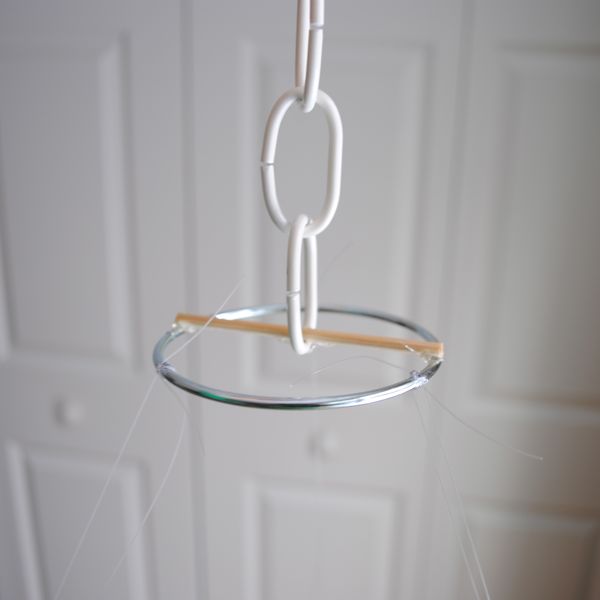
For the top, I used the smallest size craft ring and hung it about a foot above the largest ring.  I cut a wooden skewer to the diameter of the top ring, hot glued a metal rope to the center, then hot glued the sides of the skewer to the ring.
 
 
Once the frame was done, it was time to make those fake little capiz shells.  I tore sheets of wax paper about 15" long, stacked three on top of each other, and used a hot iron to bond them together.  It only takes a few seconds to iron each stack of wax paper.  I used about two boxes worth of wax paper and had around 20 finished sheets.  Then I used a circle punch to punch out the "shells."
 
Here are the tips I learned along the way.  Hold 4-5 finished sheets together to punch at one time.  Otherwise the punch sticks and rips the paper (plus it goes faster!).  Don't punch too close to the edge or the punch kind of sticks too.  I would punch a row of shells and then use a paper cutter to slice off the bottom and then do another row, and so on.  The paper cutter was much easier and quicker than cutting the punched edges with scissors.
 
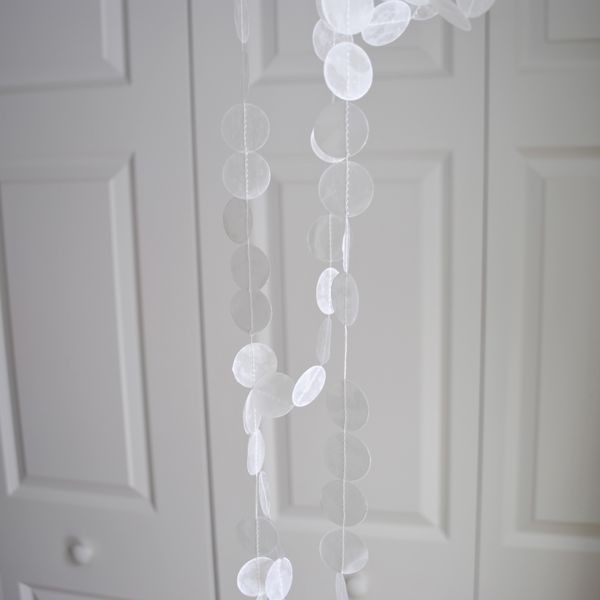
After I had a pile of the fake capiz shells, I threaded my sewing machine with white thread and used the same technique as I did for the circle garland to sew them together.  It takes a little time but with the number of shells I had, sewing was much quicker than laying them all out and hot gluing them together with thread (I've seen it done this way).  I was left with ribbons and ribbons of faux capiz shells.
 
 
I hung the frame from a curtain rod and started attaching the shells on the largest ring first.  I cut strips of five shells, put a dab of hot glue on the top shell or second from the top and then folded the top shell over the ring and pressed together with the next one to hang the strip from the ring.


I continued all the way around until the whole ring was covered then continued with the remaining smaller rings, adjusting the length each time to get the look I wanted.
 
For the top part, I glued a fake shell to the top shell on the largest ring, then held up the string of shells to determine the length, cut it to size, and glued it to the top.  You want to consider spacing here so it looks neat when finished.  I worked in quarters at a time.
 
 
When it was all finished I added an anchor and hook to the ceiling in Ada's room and put the new faux capix pendant in place.  
 
 
I could easily convert this into an actual light someday if we wind up in a house that has hard wired ceiling lights.  But for now, I love the soft, whimsical interest it adds to Ada's room. 


Full disclosure here, this was not a quick project.  Between making the frame, the fake capiz shells, and putting it all together it took me several days.  But, for me, it was totally worth the effort!
  • ehsan gholami
 
 
How to Enable or Disable the Built-in Elevated Administrator Account in Windows 7
 
information   Information
This tutorial will show you how to enable or disable the built-in elevated Administrator account in Windows 7.
 
Note   Note
Standard user (Users) - The standard account is an unelevated restricted users account. It can help protect your computer by preventing users from making changes that affect everyone who uses the computer, such as deleting files that are required for the computer to work. It is recommend to create a standard account for each user instead of an administrator account for the user. When you are logged on to Windows with a standard account, you can do almost anything that you can do with an administrator account, but if a standard user wanted to do something that requires elevated rights that affects other users of the computer, such as installing software or changing security settings, Windows will give the standard user a UAC prompt to enter the password of an administrator account for approval and confirmation before allowing the action.

administrator user - Is an unelevated administrator account that is created by default during the installation of Windows 7, or is already setup or you on a OEM (ex: Dell) computer. An administrator account has complete access to the computer, and can make any desired changes. To help make the computer more secure, this administrator account type will be prompted by UAC by default to give confirmation before allowed to make any changes that require elevated administrator rights. Such as those that affect the system, other users, or when running anything elevated (Run as Administrator) since running elevated will allow it to have access to the entire computer.

Built-in "Administrator" - Is the hidden elevated administrator account that has full unrestricted access rights and permission on the computer. By default, this elevated "Administrator" account is not prompted by UAC by default to provide confirmation before allowed to make any changes that requireelevated administrator permissions since it is an elevated account. 

 
warning   Warning
If you enable the built-in Administrator account, then it is recommended to create a password for better security.

For additional security purposes, it is also not recommended to leave the built-in Administrator account always enabled, or to use it for everyday purposes.


  • ehsan gholami